
You may add images to your posts. It’s important however to understand how images work in WordPress and follow some basic rules when processing them for posts:
- Never upload raw (phone) images to your posts. Although you can perform certain editing actions in WordPress, these are limited and initially your images are bound to be too large and have generic file names, which is not helpful.
- ALL images should be pre-processed and saved with meaningful file names (i.e. group_at_shed_opening)
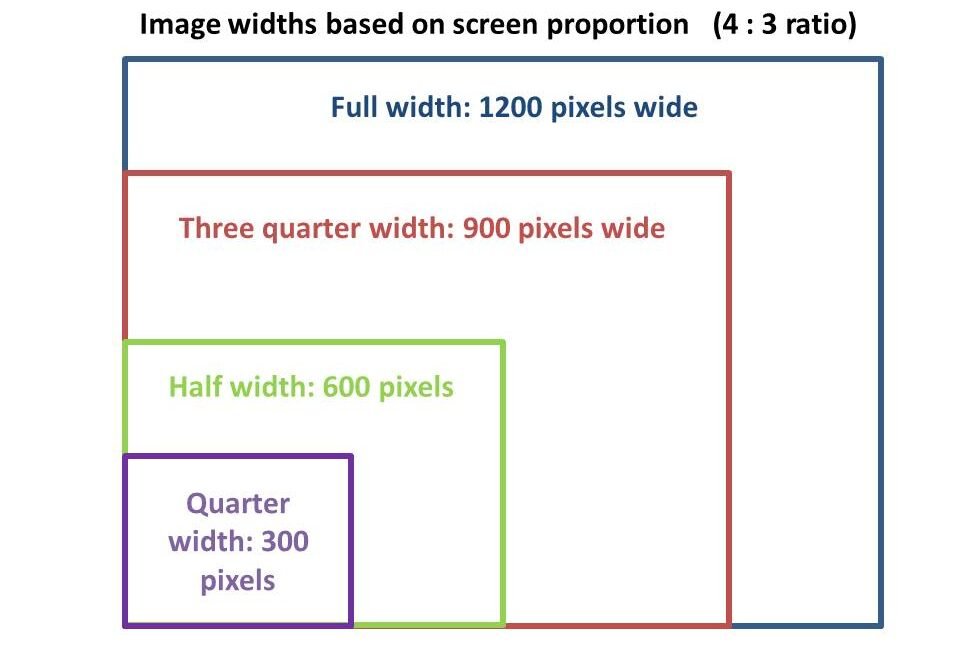
- When cropping and resizing images, pay attention to the size images are going to be used in your post (i.e. what proportion of the page/screen they will fill. See the image size guide grid below to help you decide.
- Only upload images that you are going to use in your post. Additional unused images make for site bloat.
- Delete any images that you don’t use. You also, you do not need to upload the same image file twice. One image file can be used in multiple posts, as they are referenced by the web page, not actually physically place in it.
- All images, once placed in a post should have Alternate Text added to them to explain what the image shows. Alternatively, you may add an image caption. (See ‘Page layout How To’ for guidance on this)
- Please follow the above guidelines and save the Webmaster the task of tidying up your posts. note too that any unused or duplicate images with be automatically removed by a plugin installed on the site.
Image size guide grid
Generally it is safe to assume that the maximum width of any image you use on a post will be 1200 pixels, as this is close to the full width of a PC screen. Your images should therefore be resized (width primarily) according to the percentage of the screen width they will occupy when viewed in your posts: Full page width, Three quarter page, Half page and so on as shown here:
Processing images
It’s perfectly fine to use the simple image editing program that comes with Windows: Paint. It’s not very sophisticated, but has the basic tools to crop, resize images and then save them for web use.
Paint only supports two web compatible formats: jpeg and png. This doesn’t matter, as the website has a filter that will convert any uploaded images into the best format on the fly.
It is not the intention of this guide to teach you how to edit and save images using MS Paint. It is easy to learn, besides you can choose to use another free image processing program such as Krita or GIMP, or even and online tool such as Photopea. I can recommend the latter as a very effective tool.